Building your own computer can be one of the most rewarding experiences for technology enthusiasts, gamers, content creators, and professionals who need a customized machine. While choosing the right components is essential, having the right tools is equally critical for a smooth and successful build process. In this comprehensive guide, we will break down the essential and optional tools you’ll need, explain their purpose, and offer expert tips to help you build your PC safely and efficiently.
Why Having the Right Tools Matters
Building a computer is not just about snapping pieces together. It requires precision, safety, and care — especially when handling expensive and sensitive components such as CPUs, motherboards, and GPUs. Using the correct tools can:
- Prevent damage to components
- Reduce the chance of static electricity discharge
- Improve installation accuracy
- Save time and frustration
Now let’s explore what tools you absolutely need and which ones are good to have.
Essential Tools for Building a Computer
These are the must-have tools that every builder should have on hand before starting the PC building process.
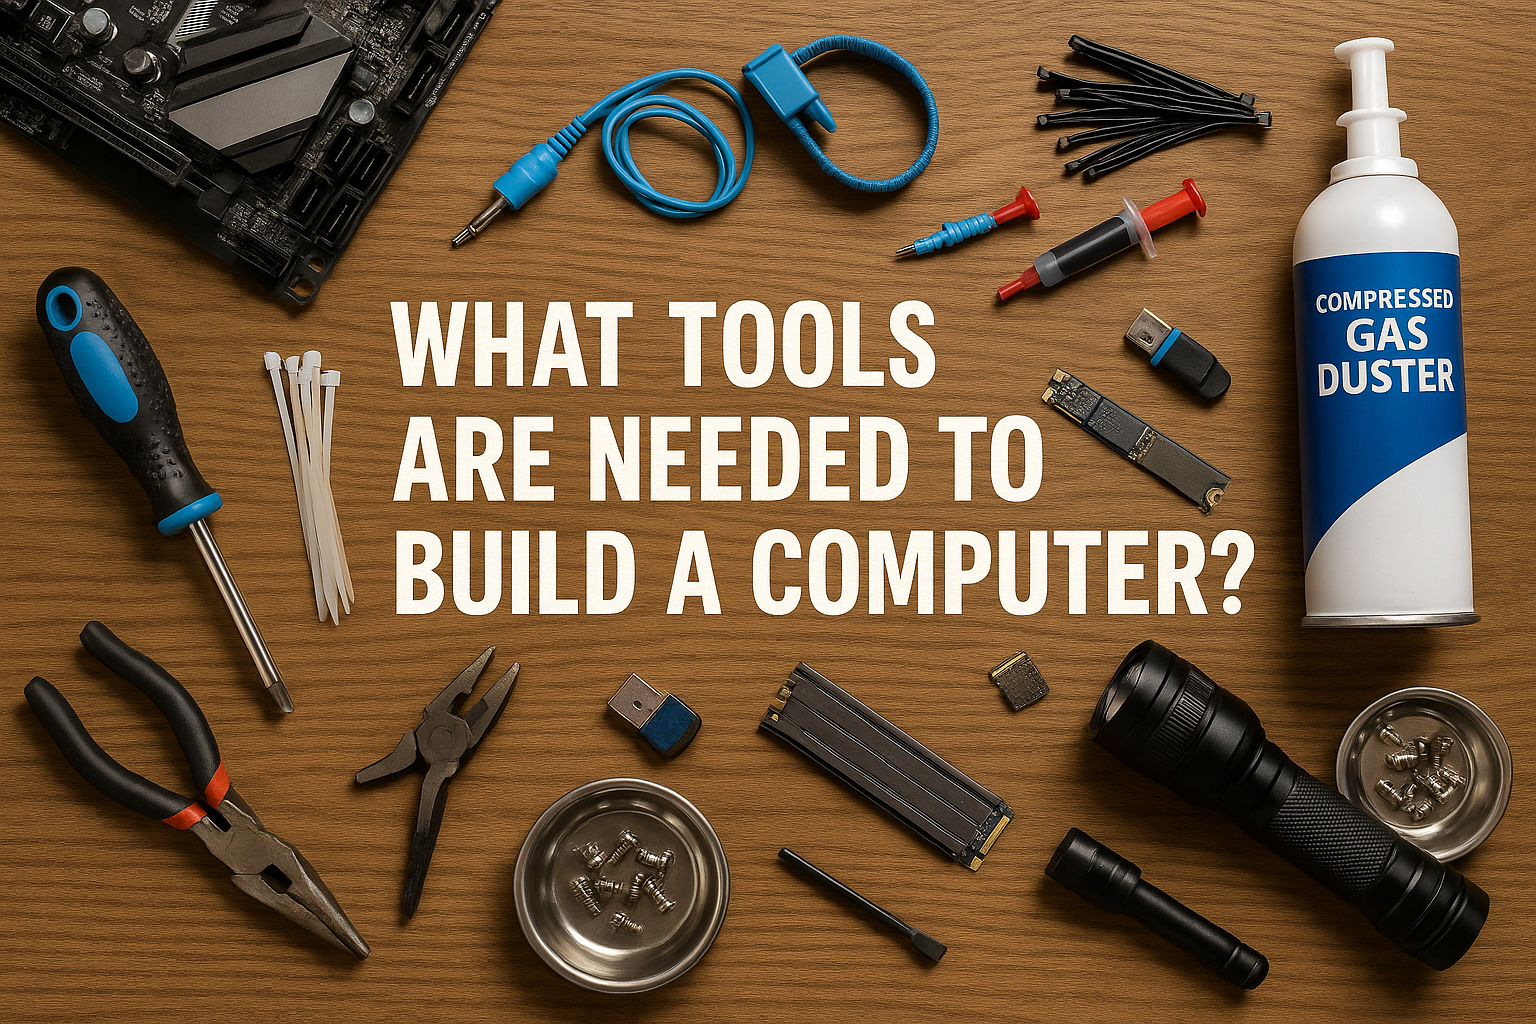
1. Phillips Head Screwdriver (Size #2)
This is the most essential tool. Nearly every screw in a PC case and its components uses a standard Phillips head. A medium-size (#2) screwdriver with a magnetic tip is ideal for holding screws steady and preventing them from falling into tight spaces.
Pro tip: Avoid using power tools or drills, as they can strip screws or damage components with excessive torque.
2. Anti-Static Wrist Strap
Electrostatic discharge (ESD) can destroy sensitive components like RAM, motherboards, and CPUs. An anti-static wrist strap grounds your body, ensuring any built-up static electricity doesn’t transfer to your components.
Simply clip the strap to a grounded metal object (like your PC case) and wear it throughout the build.
3. Thermal Paste (If Not Pre-Applied)
If your CPU cooler doesn’t come with pre-applied thermal paste, you’ll need to apply it manually. Thermal paste fills in microscopic imperfections between the CPU and the cooler, improving heat transfer and preventing overheating.
Look for high-quality thermal compounds from trusted brands like Arctic Silver or Noctua.
4. Flashlight or Headlamp
Many PC cases have dark interiors, and you’ll often find yourself working in small corners. A flashlight or headlamp helps illuminate the workspace and ensures you’re placing components correctly.
5. Cable Ties (Zip Ties)
Once your system is built, you’ll want the cables to be organized and out of airflow paths. Zip ties are cheap, effective, and help keep the interior neat, which improves both appearance and airflow.
Make sure to also have a small pair of scissors or wire cutters to trim the ends.
Optional But Useful Tools
While the tools above are mandatory, these additional tools can significantly improve the building experience.
6. Compressed Air Can
Dust is the enemy of PC performance. Use compressed air to clean components and the inside of the case before assembly. It also comes in handy if you’re repurposing older parts.
Warning: Always use the can upright to avoid spraying liquid propellant.
7. Parts Organizer Tray or Magnetic Bowl
During a build, you’ll deal with many screws, standoffs, and small brackets. A parts organizer tray or magnetic bowl keeps them secure and easy to find. Losing a critical screw can delay your build unnecessarily.
8. Precision Screwdriver Set
Some components, such as M.2 SSDs, may require smaller screws. A precision screwdriver kit with interchangeable heads ensures you’re prepared for any screw type or size.
9. Needle-Nose Pliers or Tweezers
Sometimes, fingers just won’t fit. A pair of needle-nose pliers or tweezers helps retrieve dropped screws and assists in tight cable installations.
10. Small Level Tool
While not strictly necessary, a small level can help ensure your build is physically balanced — especially useful for PC builds with custom water cooling loops or open-frame cases.
Software Tools to Prepare Before the Build
Although not physical tools, having certain software tools and files ready can save a lot of time once the PC is assembled.
11. USB Drive with Operating System
Create a bootable USB drive with your chosen operating system (e.g., Windows 11, Linux). Use tools like Rufus to make the drive and have it ready before the build is done.
12. Motherboard Drivers and BIOS Update
Download the latest drivers and BIOS for your motherboard and store them on a USB drive. This helps you get online and fully functional as soon as your system boots up.
13. Hardware Monitoring Tools
Install software such as HWMonitor, CPU-Z, or MSI Afterburner to monitor your system’s temperatures, voltages, and performance after setup.
Safety Tips When Building Your PC
Even with all the tools, safety and care should be your top priority. Here are some important safety guidelines:
- Work on a non-conductive surface (e.g., a wooden or plastic table)
- Wash and dry your hands before handling parts
- Avoid carpeted areas, as they can cause static buildup
- Don’t force components — if something doesn’t fit, double-check compatibility and orientation
- Keep beverages away from your build area
Checklist Before You Begin Building
To ensure you’re fully prepared, go through this quick checklist:
✅ Phillips head screwdriver
✅ Anti-static wrist strap
✅ Thermal paste (if needed)
✅ Flashlight or headlamp
✅ Cable ties
✅ Clean workspace
✅ OS USB stick ready
✅ Driver USB stick ready
Having everything in place before starting will streamline the entire process and reduce the likelihood of mistakes.
Final Thoughts: Be Patient and Enjoy the Process
Building a computer isn’t just about assembling hardware — it’s about creating something that perfectly fits your needs. With the right tools, a bit of patience, and some planning, even beginners can build a system they’ll be proud of.
Remember: don’t rush the process. Take breaks if needed, follow tutorials or manuals when in doubt, and double-check compatibility of parts and connectors. Once you power on your freshly built PC for the first time, it’ll all be worth it.